Guitar Chords for Beginners: Ultimate Guide
This article covers essential guitar chords, important tips, and wisdom to avoid the beginner’s most common mistakes.
You’ve all had that moment of sitting around the campfire, wishing you were the one holding the guitar. But where do you start if you know nothing about guitar chords?
The beginning of a new undertaking can be challenging and confronting. Luckily, those who conquered the fretboard before us have left a trail of all the essential things to know when you start strumming on the strings.
This short article is a starter’s roadmap that shows you the lay of the land – how to find the core guitar chords, common mistakes, and essential tips to carry with every step of your guitar journey.
What are guitar chords?
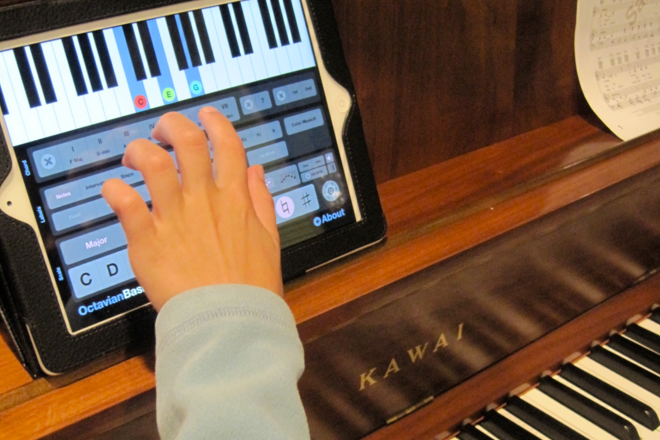
Let’s start with the basics. A chord is when you play two or more notes simultaneously. The sound of multiple notes together creates harmony, a foundational building block of all music. We create chords from scales (a series of seven notes played consecutively) and use a simple numbering system. For example, the notes of a C major scale are:

To create a C major chord, take the 1, 3, and 5 of the scale and play them simultaneously:
1: C (the “root note”)
3: E
5: G
On the guitar, there are six strings – each one is tuned to a different pitch. By placing the fingers of one hand on different squares of the fretboard grid, we change the string’s pitch, which creates different chords.
Some chords are tricky to play because they require complicated finger positions on the fretboard. Others only require two or three fingers and are super accessible for beginners.
Knowing even three of four chords on the guitar can open us up to a world of music under our fingers, but a good place to start is with the different types of guitar chords.
The different types of guitar chords.
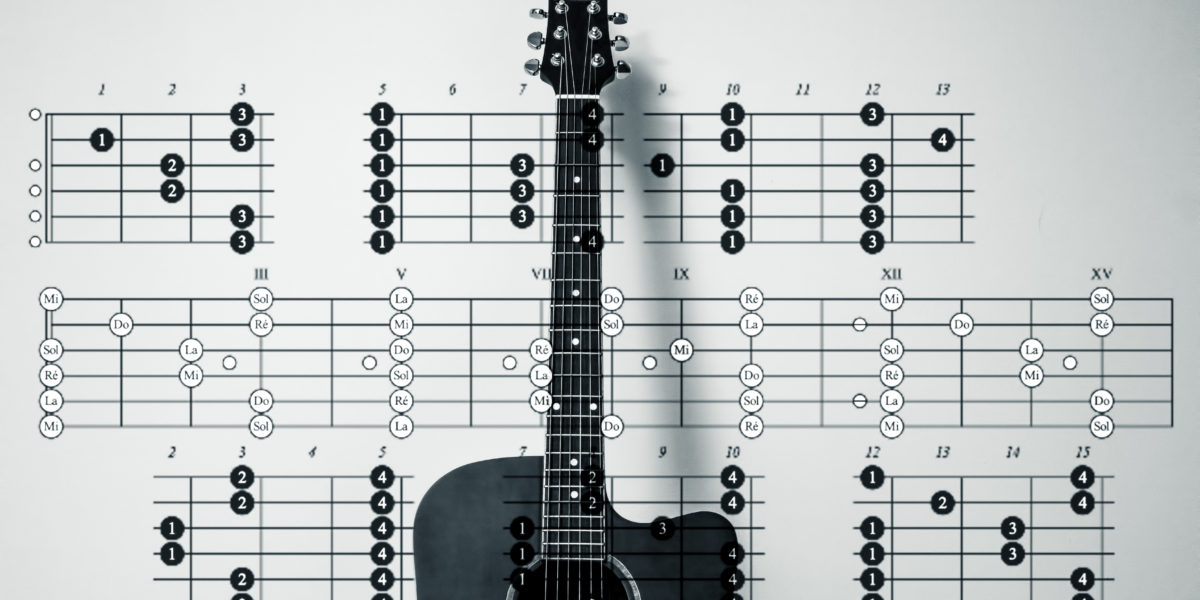
Power chords
Power chords are simple and strong because they only consist of two notes and usually only require two or three fingers.
A power chord is when the placement of the fingers on the fretboard changes the pitches of the string and sometimes mutes the strings altogether so that the only remaining notes are the root note or the fifth of the chord. This creates what is known as a “five chord” in general musical terms and a power chord on the guitar. We usually play them on electric guitar, where we can distort and amplify the sound to add even more power!
Open chords
There’s nothing quite like the vibrant resonance of an open chord on the guitar. We call these open chords because they require very few fingers, leaving most strings open in their natural tuning.
Pressing on the strings creates tension which changes the pitch – but that tension also limits the resonance of the strings. Open strings vibrate wide and far, creating a beautiful warm guitar sound. Most musicians agree that open chords sound best on an acoustic steel string guitar, and they came up with an acronym to remember the names of the primary open chords on guitar – CAGED.
Barre chords
Barre chords are when the side of one of the fingers presses down on a whole column of the fretboard. As you can imagine, this requires finger strength, and it takes time to develop.
You may already know that each square of the fretboard grid ascends the pitch by a semitone – the lower pitches at the neck of the guitar and the higher pitches towards the body. By blocking out a whole column of the fretboard, you raise the pitch of all the strings by one semitone. In addition, barre chords usually require another one or two fingers to press down on specific squares to complete the chord. These chords are very useful because they mostly use one hand shape, allowing you to move your fingers smoothly and fluidly up and down the fretboard.
Basic guitar chords for beginners.

E minor
This super easy open chord is great for beginners to get a feel for the instrument. All it requires is one finger on the second string from the bottom (the A string) and another finger on the third (the D string), both in the second column of the fretboard.

A major
This one is also a warm and pretty open chord, using three fingers in the second column on the third, fourth, and fifth strings. We don’t play the bottom string (E string) in this chord so that the lowest note in the chord will be A and not E.

G major
This chord uses a slightly trickier shape but is also an open chord. To play G major, put one finger on the second string in the second column, and two fingers in the third column – one on the lowest string (the E string) and one on the highest (also an E string).
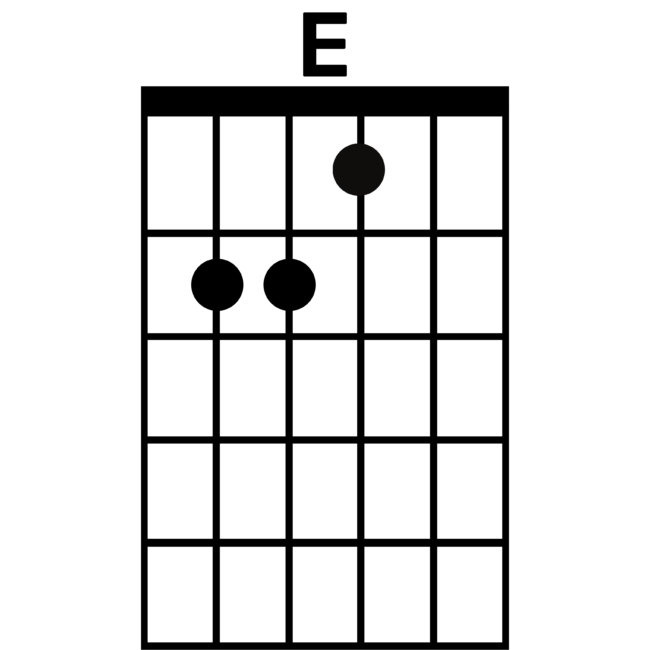
E major
This is exactly like an E minor chord, with one extra finger on the fourth string in the first column.

D major
This bright and gentle chord uses only the top four strings. In the second column, the fingers press on the fourth and sixth strings; in the third column, there is a finger on the fifth string.

A minor
This chord has depth. To play it, place one finger on the fifth string in the first column, and two fingers on the third and fourth strings in the second column. Don’t play the bottom E string; it muddles the chord.
Common beginner mistakes.
Starting on your guitar chord journey can feel like walking through a maze. We hope these tips save you time and prevent unnecessary frustration.
- Sit comfortably
It is common for beginners to hunch themselves over the guitar as they find their way around the fretboard. Make sure you check your posture – don’t sit so straight that you’re stiff, but don’t slouch over your instrument. Take deep breaths as you play, and keep your temperament cool and calm. For more information on posture, check out How to Hold a Guitar Properly.
- Practice slowly
The guitar is fiddly and delicate. It takes time for the fingers to acquire the discipline and the art of pressing on the fretboard and strumming or picking the strings. The best way to master these elements is to isolate them, choose short musical phrases or specific chords, and practice them with great patience. Don’t rush into playing a whole song or learning complicated rhythms – trying to skip grades often leads to disappointment and frustration.
- When it burns, you learn
This is an important one. Don’t be scared off by burning your fingers from pressing down on the fretboard. There is a long road ahead for beginners at guitar to create calluses, which are small grooves in the fingertips that naturally evolve by playing and practicing. The process of developing calluses is painful, as the skin of the fingertips changes shape and hardens, but eventually, you will play with ease and for long periods of time.
- Tune before play
There are endless stories of beginners who sat practicing chords and couldn’t understand why it sounded dissonant or unusual. “What’s going on? I’m playing it exactly like I was told?” So often, it was just a case of the strings being out of tune. Before you pick up the guitar to play, check each string individually to ensure they’re tuned to each other. Use a tuner or a tuning app like Simply Tune to bring each string as close as possible to its intended pitch.
Tips to play your first guitar chords.
And, of course, some tips which are not necessarily warnings but friendly advice for mastering your first chords:
- Practice fretting and unfretting
This is putting the fingers on the fretboard and taking them off. This small action will make or break the fluidity and precision of your guitar playing. It’s crucial to practice placing the fingers on and off the fretboard until you can do it smoothly and clearly, with a minimum amount of excess noise.
- Use your fingertips
Eventually, using your fingertips will give you the sound with the most strength. This part of the finger has the greatest capacity to develop calluses that can be resistant to the strings. Keep your fingers slightly arched, which also helps with your clarity of fretting and unfretting.
- Play each string separately
If you’re playing chords and something doesn’t sound right, as we mentioned before, the first thing to do is to ensure the guitar is tuned when all the strings are open. If the guitar sounds in tune when the strings are open but still inaccurate when you’re playing a chord, it probably has something to do with your fretting technique. Place your fingers on the fretboard and play each string separately to help isolate which fretting position needs to be tightened, strengthened, or realigned.
- Keep the strumming simple
Strumming techniques are difficult to master, especially when you’re still figuring out how to navigate the fretboard. Choose a simple strumming pattern in a 4/4 time signature – you can check out these 7 Essential Strumming Patterns to get an idea of where to start.
Divide and conquer.
In the end, dividing your conquest into sections is the only way to cover all the ground of guitar basics. Create dedicated time for practicing chords, time for fretting, practice time for strumming patterns, and even some time set specifically for learning music theory. This kind of practice and learning discipline is difficult to implement. We highly recommend the Simply Guitar app for learning guitar, with interactive and step-by-step guidance.


