10 Best Piano Exercises for Beginners

Learning how to play the piano can be a fun and rewarding process. However, to play effortlessly, you’ve got to set aside time for piano exercises.
Just like every coach encourages their athletes to warm up before a game, you want to warm up your fingers and drill your skills before you play.
You can train your fingers to find the right notes by stretching your muscles, playing scales, practicing chord progressions, and more.
We’ll walk you through some good piano exercises for beginners that can help you build your skills and accelerate your learning time.
1. Finger and arm stretches
You may not need a leg day to play piano, but you will need to build strength in your fingers and hands. Finger and arm stretches are a great way to get your hands ready for the keys. Here are a few good arm and hand exercises for piano beginners.
First, work on warming up your arms. Gently pull your straight arm across your body with the opposite hand. Hold it for ten seconds, then switch arms. Next, stretch your arms over your head and let them relax at your sides. Then clasp your hands behind your back and raise them towards the ceiling.

After you warm up your shoulders and arms, it’s time to work on your hands and fingers. Ensure that you trim your nails to get the proper hand shape.
Start by slowly clenching your fists. Hold your hands in this clenched position and count to five. Then, open your hands and spread them apart, and relax for five seconds. Repeat as needed.
Another piano exercise is to press each finger on a flat surface. Press each fingertip as if you were pressing down a key. Then rock the tip of your finger as you press to help it find its balance.
Not only do warm-up exercises help your hands nimbly dance across the keys, but these exercises can also wake up your brain. As the blood begins to flow through your body, you may find that it’s easier to focus when you sit down at the keyboard.
2. Five finger patterns

The five-finger pattern (or pentascales) warmup is excellent for beginners because it’s one of the most straightforward piano exercises to familiarize yourself with different key signatures.
You can start in C major with your right thumb on middle C. Your fingers will be on all white keys for the C major five-finger pattern. Play each note individually up the five notes and then go back down to middle C. When you feel confident, add in the left hand on the C below middle C and lay both hands simultaneously.
To practice the five-finger scale in other key signatures, just remember to follow the whole step, whole step, half step, and whole step pattern. You’ll notice that the third and fourth tones are just a half step apart in major scales.
For example, if you are playing in the key of A, you would use A, B, C#, D, and E. There are whole steps between all the notes except between C# and D, where you have a half step.
These five-finger scales are a great way to train your ear and familiarize your fingers with the notes in a key. Also, telling your friends that you can already play pentascales on the keyboard is sure to impress them.
3. Major & minor scales
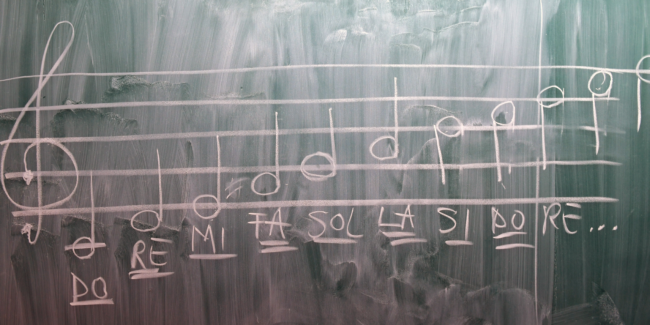
When you get some keyboard notes under your belt, you can start to practice two-octave scales as a warm-up. These piano exercises are suitable for beginners to learn finger independence.
And unlike other warm-up sheet music, these drills are free!
Many musicians choose to play a major scale with one hand going up and then switch to a minor scale when coming back down. After you master the scales in each hand individually, try putting both hands together.
Major and minor scale practice will allow your fingers to learn muscle memory. In time, your fingers will begin to find the right notes automatically.
4. Triads
Triads are a great way to practice chords. A triad has three notes. In its root position, the lowest note of the chord will be the note of your major key. Then the third and fifth tones of the key will complete the major chord.
For example, if you play in A major, the lowest note in the triad will be A, C#, then E. To make a triad in a minor key, simply move the third tone down a half step.
After finding the basic major (or minor) triad in root position, play this chord in its other locations up and down the keyboard. Then, try playing the chord in its inversions.
Chord inversions
To find the first inversion of the chord, you use the same three notes you just played in root position. However, instead of the keynote, use the third tone as the bottom note.
In the key of A, you’d play this: C#, E, and A.
For the second chord inversion, use the fifth tone as the bottom note and play the chord: E, A, and C#.
Now, try playing these chords from the root position to the first inversion and second. It’s a bit like juggling, but you are inverting sounds instead of balls.
5. Shadow playing
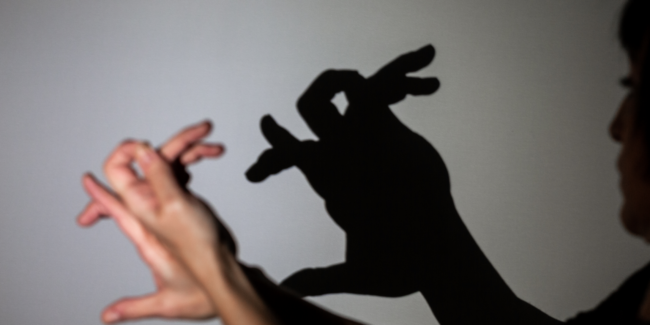
Shadow playing allows you to play through your music without the keys. Close your piano lid and let your fingers go through the motions on top. This exercise builds finger strength, anticipates key distances, and focuses on proper fingering.
This practice allows you to work on proper finger skills without hearing the notes wrong. Build your confidence and skills, then open up your piano and listen to how it sounds on the keys.
Shadow playing can be beneficial when you want to practice but aren’t near a keyboard. Take your sheet music with you, and you can keep up your skills anywhere you go!
6. Sight-reading

Another great way to warm up is sight-reading. Sight-reading is just playing through new music that you have never seen before. For this exercise, your focus is less on perfection and more on persistence. Don’t go back and fix mistakes. Instead, you just fake it till you make it. Go slow and keep working through the music. Applaud yourself for correct notes and for expressing the main melody.
You can try this exercise when you get a new piece of music. Run through it once or twice sight-reading before you start to hammer out the details. Or, this can be a good tool when you begin to feel bogged down in your practice sessions. Pull out a fresh page of music to train your eyes, brain, and fingers to work quickly toward the same goal. Just have fun and do your best.
7. Playing partial chords
As you work up to more challenging pieces, your chords will also grow in size. You could even have chords where you need to play five notes using one hand!
As you practice larger chords, you might need to stop often and make sure you are hitting the correct notes in your left hand. Instead of eating a whole elephant in one bite, break down the chords in the left hand into smaller, manageable pieces. Better to focus on getting a few notes right than to play several wrong notes.

So which notes should you play in a partial chord? Most musicians consider the third and seventh tones as the most important notes in a chord. The root note and fifth tone are usually not as necessary.
Playing partial chords in your left hand can help you build up your speed, flow, and confidence.
As you start to rely less on the music and more on your memory to play through the piece, you can begin to add in the rest of the chord notes in the left hand.
8. Steps & skips
The components of a melody are steps, skips, and repeating notes.
Steps are when you move up the keyboard in consecutive note intervals. For example, this line of music shows note steps:
Skips are when you skip over notes in larger intervals like below:
You can practice a two-octave scale in steps and then work even further on your fingering skills by going up and down the notes using skip intervals.
This exercise can also be helpful if you find that you have some skip intervals in your piece that you have difficulty hitting in practice time. By isolating the skip intervals in your piece and working out the kinks, you can get your fingers ready for flawless playing.
9. Finger pedaling
Finger pedaling can be helpful when you want a ‘legato’ sound but still want to maintain some note clarity. To finger pedal, you want to hold a note down slightly longer than written while playing the following note. This creates a smooth, mellow sound that is slightly clearer than is possible with a foot pedal.
Play your piece using the foot pedal and listen carefully to the sound to start this exercise. Then, try to recreate this smooth sound using your fingers instead of the pedal. You want to blend the transition from one piano key to the next, ensuring you don’t muddle the notes together.
Finger pedaling can give you clearer notes than a foot pedal and is excellent for independent finger control.
10. Playing music backward
If you play your piece flawlessly but have difficulty sticking those last notes, your tune may fall flat. To prevent an unfinished ending, try playing your music backward.
We’re not suggesting you play a piece from the last note to the first for this exercise. In the words of one pianist, “that’s devilishly hard.” However, it can be helpful to practice the ending measures of the piece first.
When you take a song measure by measure and out of order, you can focus on your hard spots and polish them until they shine. All’s well that ends well, so finish strong!
Another helpful backward exercise is to read sheet music from the end to the beginning before you play. Sometimes when we read and play music, we can miss important details. Reading the piece backward can train your eye to look more carefully at each note and chord on the page.
Once your eyes have studied the chord progressions on the page, it will be easier for your fingers to find the right notes.
Practice makes perfect.
We’ve listed a few of our favorite techniques for warming up your mind, muscles, and fingers to tickle the ivories. Find which exercises are the most useful for you and play your heart out!
After your fingers are ready to go, we can work on even more techniques together in the Simply Piano app. Download it to your phone, and we’ll keep practice fun and give you instant feedback as you play!


